Fascinated By Furniture Flipping? Up For Upcycling?

If you’ve ever seen a quilt made from old t-shirts, a rug knitted from plastic bags, candles poured into wine bottles that have been cut in half, or jewelry beads made from magazine pages, then you’ve come across “upcycling.” A term coined in 2000, the fast-growing trend of upcycling is generally understood to be the process of converting old or discarded items into something useful and beautiful – otherwise known as creative reuse.
Depending on the utility and beauty of the finished product, many crafty artisans have begun selling their repurposed goods and have made upcycling a side business. A recent search for the term ‘upcycle’ on craft-selling mega-website Etsy returned over 300,000 listings for sale.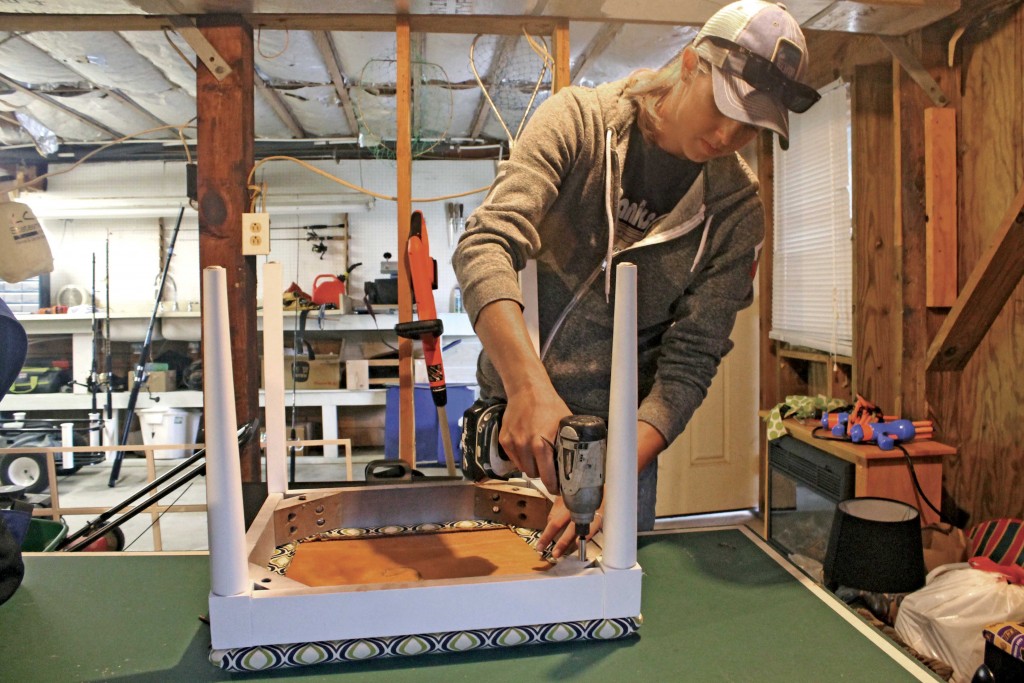
Local graphic designer Lanie Whitaker began her own money-making version of upcycling, or what she calls ‘furniture flips,’ six years ago. Now, in partnership with her fiancé, Nina Compton, they work together on their side business. “Upcycling is not just about finding cool stuff in yard sales or flea markets and putting them in your house. It’s about finding things that would never be used again, and giving them new life or a new purpose, while saving a couple bucks and creating a conversation piece to show your guests,” says Whitaker.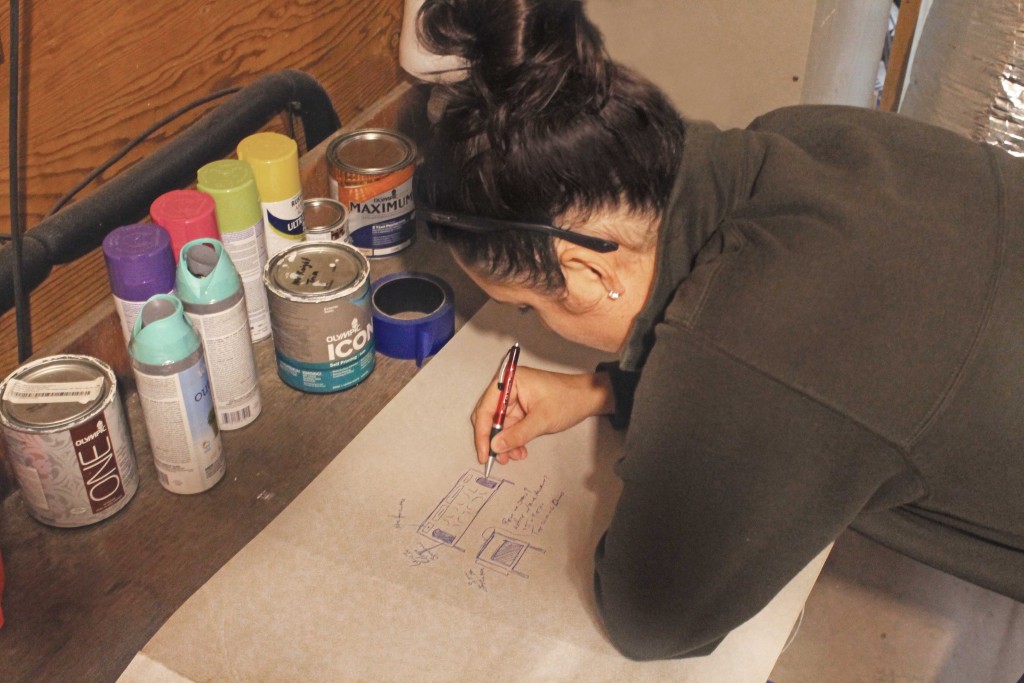
“We buy things from yard sales, flea markets, Craigslist, and even pick them up off the side of the road. I don’t have any background in construction, but I have the design eye, while Nina is the exact opposite: I do all the design; she does all the labor.”
Together they produce upcycled furniture and home accents and re-sell on Craigslist and other outlets. “To be honest, I’m just a local HGTV/DIY freak and I see the beauty in things that other people see as trash,” says Whitaker. Here, she explains a few projects that may inspire others to do the same.
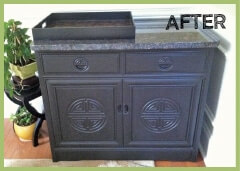
Did You Hear the One About the Bathroom Vanity that Walked into a Bar?
The Story: This bathroom vanity was found on the side of the road in Boiling Springs, SC. The back was rotten and spiders were living in it. The granite top was lying beside it with a large chip in the corner. Fortunately, the interior wood was beautiful and didn’t need to be touched.
The Transformation:
Step 1: Rip out rotten wood and sand down the remainder in preparation for paint.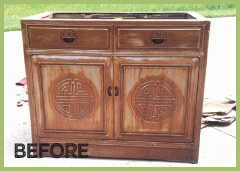
Step 2: Paint the exterior black. (Sanding the grooves can be a nightmare if staining).
Step 3: Replace the rotten backing with a thin sheet of wood.
Step 4: Grind and polish the chipped edge of the granite top. (We used Turtle Wax’s polishing compound)
Step 5: Convert sinkhole into a designated spot for drink-mixing tools by gluing down a tray in its place.
 Materials Used: Palm sander, semi-fine and fine sandpaper, hammer, small nails, black satin interior paint, various paint brushes sizes, electric grinder, polishing compound, table tray, heavy-duty construction glue.
Suggestions for Personalizing: Consider using the sink opening as is for an ice bucket, or cover the sinkhole with a cutting board that can be used to assist drink making.
What attracted me: I actually passed this vanity on the side of the road several times, debating whether or not I wanted to try and redo it. I second-guessed myself because of the chip in the granite and wondered what I would do with the hole where the sink went. But in the end I grabbed it up, because who can pass up free granite?
Total Cost: [For us] the whole thing was free to do: we already had paint, extra wood to close off the back, and the tray to cover the hole.
Metal Meets Wood
Story: I found an ugly, pink metal stool and a thick, butcher block cutting board at a flea market called “The Barnyard” in Greer, SC. The stool looked like it had been used in a bathroom or shower, and the butcher block had heavy divots from kitchen knives.
Transformation:
Step 1: Rip off the white, rubber-textured material on top to expose the metal seat. Use household cleaner, plyers, and utility knife to remove remnants.
Step 2: Spray-paint entire stool. (Two coats did the job).
Step 3: Using a large-blade circular saw, cut the rectangular butcher block into a small square the size of the top, being sure to leave a little extra to rout the edges.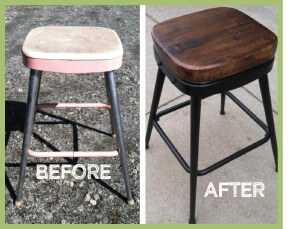
Step 4: Round off the corners with a jigsaw and then smooth off all of the edges with a router.
Step 5: Sand down all sides with super fine sandpaper and clean off the sawdust with water. After the top dries, apply one coat of stain to the wood and then seal it with polyurethane.
Step 6: Lastly, screw the top to the underside of the chair so that screws are hidden.
Materials used: Stool, butcher block, circular saw, jigsaw, router, palm sander, fine sand paper (360 grit), wood stain, gloves, towel (that can be thrown away after applying stain), 4 heavy-duty screws, drill, black spray paint, utility knife (to tear away rubber from old stool).
What attracted me: I love industrial design, so I often look to put wood and metal together in one project. Taking two unusable objects, buying them cheaply, and putting them together created a very usable piece of furniture with some style.
Total Cost: $17. The stool was $2, and the butcher block was $5. Spray paint and stain are about $4 per can; a few screws added another $2.
A Move for More Storage
The Story: We found these boxes in the trash by the Kitty Hawk Kites warehouse in Kill Devil Hills. There were actually three, but the other one was falling apart, so we decided not to use it.
The Transformation: I found an old U-Haul moving blanket in a yard sale. I cut up the blanket to fit as a strip in the box and stapled the fabric to the top of the overhang on the top edges. And that is it…the blanket gave it a little character and protected the contents of the basket from getting snagged from the rough wood of the baskets.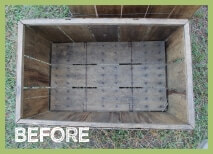

Materials Used: Seafood boxes, moving blanket, staple gun, T-50 staples, fabric scissors, measuring tape.
What attracted me: The seafood labels on the boxes, and the wood that the boxes were made out of seemed very rustic and “beachy” to me. Who doesn’t love different ways to store your junk? They were also a pretty cool size for towels and other beach/outdoor things.
Total Coast: $5 for a U-Haul blanket that I found at a yard sale; the baskets were free, and we already had the other materials.
Only A Small Cover Charge
Story: We found the table and chairs at a local thrift shop in Kitty Hawk that offers 25% off of all furniture on Tuesdays. This set was very outdated and worn.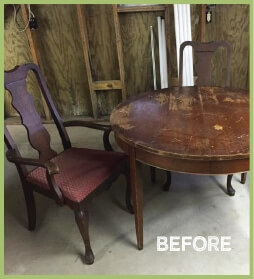
Transformation:
Step 1: Remove old seat bottoms.
Step 2: Sand down all stained areas of the table and chairs.
Step 3: Prep the surfaces for painting by wiping off all sawdust. (The wood was not in good enough condition to stain; otherwise, staining is always my first option, says Whitaker).
Step 4: Paint the chairs. We chose to paint them overall white but the top and interior portion of the chairs, a light grey, to add a little contrast. It took 3-5 coats, with the last couple coats mainly for touch-ups.
Step 5: Cover the chair seat bottoms with new fabric. With about 3 yards of fabric, cut out pieces for each cushion, and staple edges to the bottom. In some cases the original fabric may show through, so that must be removed first. We used a thick-enough material that concealed the old pattern.
Step 6: Polyurethane the top of the table.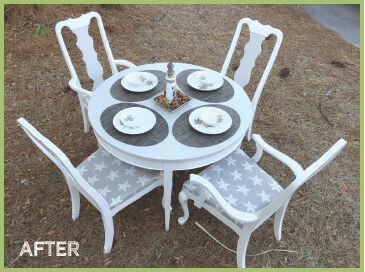
Materials Used: Satin, indoor paint, variety of paint brush sizes, palm sander, semi-fine and fine sand paper, rags, drill, stapler with T-50 staples, 3 yards of fabric (depending on number of chairs).
What attracted me: It was actually the final price tag that interested me; a table and four chairs can [cost] $200 or more. I knew that the only major cost would be the fabric.
Total Cost: $90. With a furniture cost of $20, the splurge was on the $60 fabric. Because we already had some paint, we only spent an additional $10 for paint.
Play It Again, Bartender!
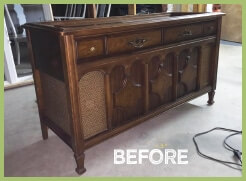
Story: We found this defunct record player in a local thrift store in Kitty Hawk that offers a 25% discount on Tuesdays.
Transformation:
Step 1: Disassemble and remove all of the electrical components, speakers, and speaker fabric panels from the inside of the record player box; remove all hardware.
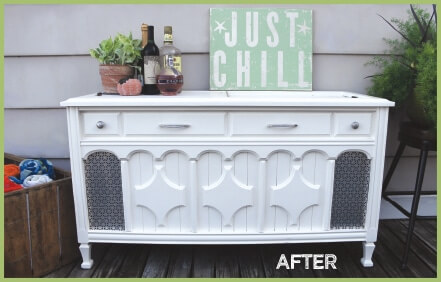
 Step 2: After the console is cleaned out, add framework on the inside for storage and metal grates where the speaker fabric used to be.
Step 3: Paint the exterior. Leave the inside as fresh wood. Paint a contrast area where the metal grates are attached for a pop of color.
Step 4: Install new hardware and drawer pulls and close off the back of the console with a thin sheet of wood.
Materials Used: Satin, indoor white paint, indoor spray paint in contrast color, 3 sheets of decorative metal, 2 drawer pulls and 2 cabinet handles, 1 sheet of ultra-thin hardboard/plywood, 2 sheets of thicker plywood for interior build, circular saw, various paintbrush sizes, metal snips, drill, hammer, small nails/tacks,
Suggestions for Personalizing: Choose different paint colors; fill in speaker holes with something other than sheet metal. Use modern or retro hardware. Add a decorative element to the front of the console. Customize the interior framing or shelving to organize your belongings, or leave it as one larger empty space as I did here.
 What attracted me: When I saw this record player, I was immediately attracted to its vintage qualities and was hopeful that the record player would actually work. When the record player didn’t work, I saw the sliding doors on top as an easy access for drinks at a bar, or storage for party favors or kitchenware that you don’t use often. In the end, we will use it for storage as a buffet-style piece.
Total Cost: $80: the record player cost $20; the cost of wood was around $30; and the metal sheets were $30. We already had the paint.
Meaghan Beasley has dreams of upcycling many items around her home, but she hasn’t followed Lanie’s advice yet.
A Few Tips For Upcycling Success:
- Try to preserve and reuse any materials you already have before buying. That’s what makes it upcycling.
- Some pieces are beautiful the way they are; they just need a cleanup or a few cosmetic fixes.
- Think about staining before painting to bring out the beauty of original wood.
- Make sure you have the necessary tools and skills to complete the project before you begin.
- Budget out the expense before you buy; sometimes it’s not worth it. If you have to spend a lot of money on materials, or if the flip will take up a large amount of time for little reward; pass it up, and find something else.
- If you’re just starting out, try flipping something small for yourself. Don’t go for the big, costly overhaul your first time out.
- When trying to appeal to buyers, choose something that will sell quickly and is a common need for homeowners.

Author: Meaghan Beasley
Meaghan Beasley has lived on the Outer Banks over 14 years; although not a local herself, she married one and finds herself completely at home here among the water and dunes. A sort of modern Renaissance woman, Meaghan works as an Indie Bookseller, a bookkeeper, a freelance writer, a small sewing business owner, and the wife of a crabber (truly a job in and of itself). When not working, she's reading: on the beach, on the deck, on the couch – anywhere's perfect for reading!

